Azek Gate User Manual

Browse online or download User Manual for For Home Azek Gate. AZEK Gate User Manual

  • Download
  • Add to my manuals
  • Print
  • Page
    / 3
  • Table of contents
  • BOOKMARKS
  • Rated. / 5. Based on customer reviews
Page view 0
Tools Required
Parts
Rail Kit Items Required
Hardware
• Each Gate kit comes complete with hardware and installation guide to build one
complete single or double gate utilizing an AZEK Rail Kit (must be purchased
separately). Check the enclosed material list to ensure that the kit is complete.
AZEK Gate should be installed in accordance with the installation guidelines
included below. AZEK Building Products Inc. accepts no liability or responsibility
for the improper installation of this product.
AZEK Gate Kit is designed to be built to the size for which it is manufactured and
should not be altered in any way. Finished interior opening for AZEK Gates are to
measure 42-1/4” for the Single Gate and 83-1/4” for the Double Gate.
• NOTE: Gate Kit will not work with Tall Boys (steel surface mount bracket)
AZEK Gate may not be suitable for every application and it is the sole respon-
sibility of the installer to be sure that AZEK Gate is used for its intended pur-
pose. Since all installations are unique, it is also the installer’s responsibility to
GATE INSTALLATION GUIDELINES for
AZEK Premier
AZEK Trademark
Page 1
(2) 3" 3/8 Lag Screws
(12) 3" #8 Wood Screws
(16) 1/4-20 Shoulder Screws
(1) 3/4” #10
Flat Head Screws
(2) 3/8-16 Hex. Nuts
(5) 1" #8 Wood Screws(2) 3/8-16 Set Screws
(2) 1/4-20 Pan Head Screws
(2) 1/4-20 Flat Head Screws
(1) Hinge Pin
(1) Bottom Extrusion
(1) Top Extrusion
(2) Male Cam
(2) Female Cams
(1) Latch Assy w/Hardware
(2) Screw Caps
(1) Latch Side End
(1) Inner Hinge Plate
(1) Outer Hinge Plate
(1) Hinge Side End
(2) Top End Cap
Tab
(2) Bottom End Cap
Latch Fastener Pack
(6) 2” Wood Screws
(5) 1” Self Tapping Screws
(6) Balusters
(1) Bottom Rail
(1) Hand Rail
Please read all instructions completely before starting any part of the installation.
determine specic requirements in regards to each gate application.
AZEK Building Products recommends that all applications be reviewed by a
licensed architect, engineer, or local building ocial before installation. If you
have any questions or need further assistance, please call AZEK Customer
Service at 877-ASK-AZEK (877-275-2935) or visit our website at www.azek.com.
IMPORTANT: Make sure the DRIVE TOOL/DRILL is congured or set to use the
SCREW setting when driving and/or tightening all FASTENERS.
SAFETY: Always wear goggles when handling, cutting, drilling and fastening
materials.
WARNING: AZEK Gate is for decorative use only and should not be used in a
load bearing application.
NOTE: Check local code requirements prior to installation particularly as to
required distance between balusters to avoid child entrapment..
© 2012 All rights reserved. AZEK Building Products, Inc.
www.AZEK.com
3/16”
Allen Wrench
Drill
9/16”
Socket
3/16”,1/8”,5/16”
Drill Bit
Square
Drill Bit #2
Phillips
Screw Driver
9/16”
Wrench
Level
Miter/Chop Saw
Page view 0
1 2 3

Summary of Contents

Page 1 - Hardware

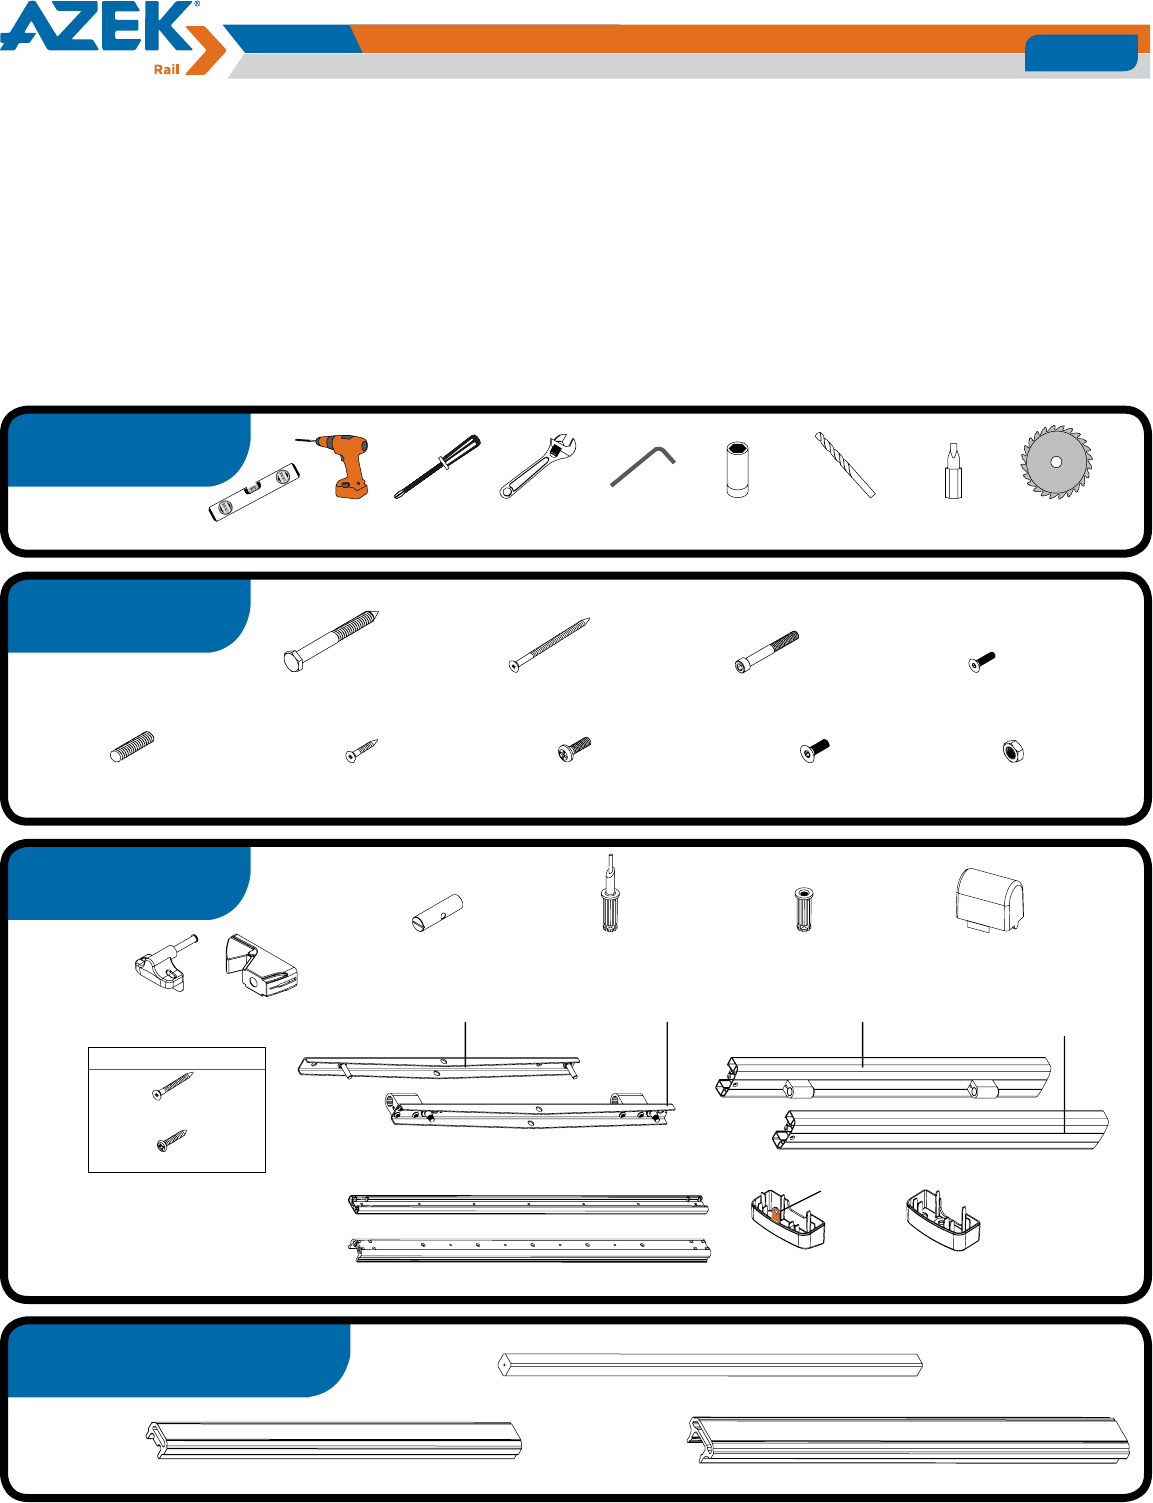
Tools RequiredPartsRail Kit Items RequiredHardware• Each Gate kit comes complete with hardware and installation guide to build one complete single or

Page 2 - Assemble Hinge Side End

4” gap42”gate4” gap6 3/8”3 3/8”• Do not over torque screws into post.162834 5Assemble Outer Hinge PlateDrop Gate Assembly onto Hinge AssemblyAssemble

Page 3 - Parts_DblGate

ToolsLevelPhillips Screw DriverWrenchAllen KeysDrill ToolsLevelPhillips Screw DriverWrenchAllen KeysDrillDo Not Put NutOn Set Screws.Step 7_Double Ga

Comments to this Manuals

No comments